Lorna’s Spinach Pies (Fatayer-bi-Sabanekh)

By Paul Shalhoub – WLCU Sydney Chief Editor
My late mother’s spinach pies were one of my favourite foods. They are eaten at room temperature and will keep a few days out of the fridge (mind you ours never last more than 24 hours). Although called spinach pies they are made with silverbeet and there is almost as much onions, herbs and spices as there is silverbeet! The combination produces the most wonderfully flavoured mixture that most can’t resist. Perfect when served as an appetiser, as part of a mezza or with a drink, or even by themselves as a snack or meal.
Every region in Lebanon has their own variety – perhaps including tomatoes, pine nuts or pomegranate molasses (debis el remmen) in the filling. My mum’s had none of these ingredients, but plenty of flavour from the vegetables, herbs and spices. Likewise, the pastry can be made from pizza dough and contain yeast or even include dried milk powder. My mum’s pastry was very basic and serves as a thin neutral tasting shell with all the flavour coming from the filling. It is a relatively crispy pastry. What I dislike most about store made spinach pies is that their pastry is usually thick and when eating them you end up with a mouth full of dough and minimal spinach flavour – but again, each to their own, it’s all personal preference. If you prefer a softer pastry the internet has many articles that use yeast to give a softer texture or you can use pizza dough.
FILLING
Ingredients
- 1 large bunch of silverbeet (also known as Swiss chard) – stalks and thick white parts removed) roughly chopped
- 2 bunches of green shallots (also known as scallions) chopped
- 6 onions coarsely chopped (it sounds a lot, but it will depend on the size of the bunch of silverbeet – however the onions add such incredible flavour and sweetness to the pies)
- 1 bunch of parsley – including the stalks – chopped
- 1 bunch of mint – chopped
- Spices (listed below at point 3)
Method
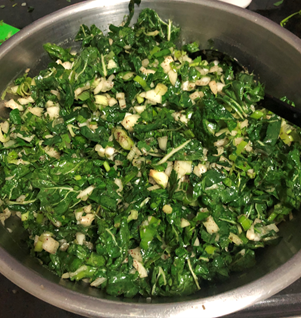
- Wash and dry the above ingredients (silverbeet, shallots, onions, parsley and mint).

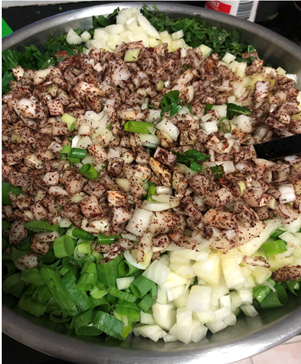
- Chop the above ingredients and place in a bowl with the onions on top. You will want to add the seasoning and spices to the onions, so it sticks to them.
- Add on top of the chopped onions:
- 1 teaspoon citric acid (you could use lemon juice, but the citric acid reduces the liquid in the mixture, which stops the pastry becoming soggy).
- 1 tablespoon dried mint
- ½ teaspoon of cayenne pepper (optional – and can be more or less to taste)
- 1-2 teaspoons salt
- 2 tablespoons sumac (again this can be adjusted to taste, depending on how tart you like the mixture). The sumac gives it a unique, lemony flavour.

- Mix the spices through the onions where they should stick to them.
- Finally Add ¼ cup of olive oil and mix it all, like a salad. It should have about the same oil as a dressed salad, so add more if it’s too dry.
- At this stage you can taste the mixture (as you would a salad) and adjust the seasoning. Especially with respect to salt, cayenne pepper, sumac, citric acid and the olive oil. Everybody will like it adjusted differently.

PASTRY
Ingredients
- 4 cups plain flour
- A couple of pinches of salt (say half a teaspoon)
- A tablespoon of olive oil
- About 400ml of warm water to bind and form the dough
Method
- Add flour and salt, mix. Begin adding about half of the water and mix slightly, then add the olive oil and then enough water to bind the dough and ensure it is silky and easy to work with. You can always add more water or flour if required.
- Knead the dough well and then let it rest for about 20 minutes. You can mix it all in a bowl. I will often use my KitchenAid mixer with the dough hook attachment.
- Working with part of the dough on a well-floured surface (keeping the remaining dough covered so it doesn’t dry out) you can either roll it out in a thin sheet and then cut out circles about 15cm or divide the dough and individually shape them.
- When the dough circles are as thin as you can get them (without tearing the dough), place as much of the filling in the centre as possible (remembering that you want to fold them without breaking).

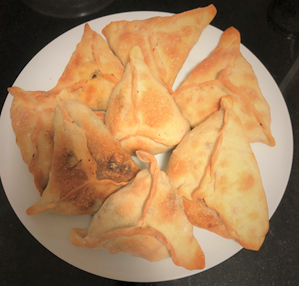
- Ultimately these will be enclosed in a triangle shape. You begin by bringing up two of the sides from say 3 o’clock and 9 o’clock and begin sealing them (by pinching the dough together) from 12 o’clock working downwards. You then bring the bottom part up and seal it against the dough (see photo below).

Begin folding – pinching to properly seal.
- Place on a lightly greased tray, using baking paper or a silpat baking mat if you prefer.
- Bake at 180 degrees C for about 30 minutes – or until very lightly browned.
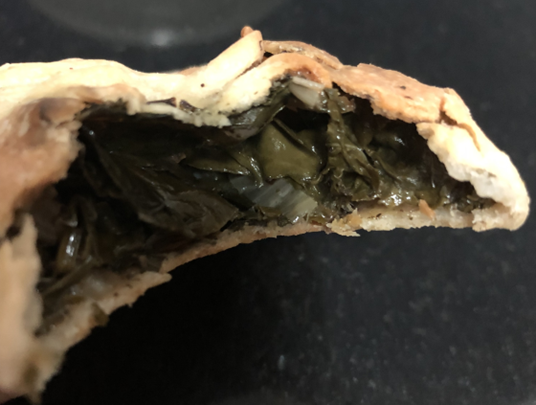
- The finished pies should have a very thin crust and be filled with the delicious mixture.

- Allow to cool for a couple of hours on a wire rack before eating.
- They can be frozen before cooking and cooked at a later time. I place them on a lightly floured surface in the freezer for a couple of hours until they are semi frozen, then move them to suitable freezer bags before fully freezing them.

